Oufu Optical Fiber Cable Co.,Ltd
Address: Shenyang, Liaoning, China
Contact person: Manager Zhang
Phone: 400-964-1314
Mobile phone: +86 13904053308
【whatsapp && wechat】
2024-07-03 1529
MTP Fiber Connector Installation Guide: A Step-by-Step Approach to Boosting Data Transmission Efficiency
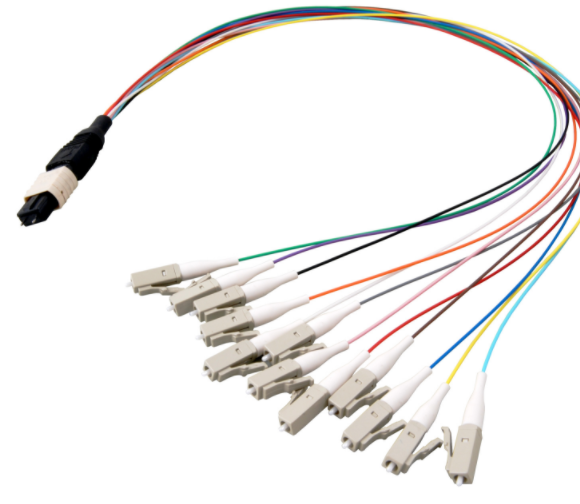
In the realm of high-speed networking and data centers, the importance of efficient and reliable fiber optic connections cannot be overstated. MTP (Multi-fiber Push-On) fiber connectors are rapidly becoming the go-to choice for these environments, offering unparalleled benefits in terms of density, scalability, and performance. This installation guide will walk you through the process of installing MTP fiber connectors, ensuring a seamless integration that enhances your data transmission efficiency.

1. Gather Necessary Tools and Materials:
MTP fiber connectors
Fiber optic cables (pre-terminated or to be terminated)
Fiber cleaver
www.adsscable.cn
Fiber optic stripper
Cleaning wipes or alcohol pads
Fiber optic microscope (optional but recommended for precise alignment)
MTP adapter or panel for mounting
2. Safety Precautions:
Wear protective eyewear to prevent eye injuries from fiber shards.
Ensure proper ventilation to avoid breathing in dust or fumes from cleaning agents.
Use caution when handling sharp tools like cleavers and strippers.
1. Strip the Jacket:
Use the fiber optic stripper to carefully remove the outer jacket of the fiber optic cable, exposing the buffer tube.
2. Expose the Fibers:
Cut the buffer tube to reveal the individual fibers. Ensure you don't damage the fibers during this step.
3. Clean the Fibers:
Use cleaning wipes or alcohol pads to thoroughly clean the exposed fibers, removing any dust, oil, or debris that could impair the connection.
1. Prepare the Cleaver:
Ensure the cleaver is clean and properly calibrated.
2. Cleave the Fibers:
Place the fibers in the cleaver's clamp and activate the blade to create a precise, flat end face. This step is crucial for achieving a low-loss connection.
1. Inspect the Connector:
Examine the MTP connector for any damage or debris. Clean the ferrule end if necessary.
2. Align the Fibers:
Carefully align the cleaved fibers with the guide pins inside the MTP connector. Use a fiber optic microscope for precise alignment if available.
3. Insert the Fibers:
Gently push the fibers into the connector, ensuring they are fully seated and aligned correctly. Avoid excessive force, as this could damage the fibers.
4. Crimp or Secure the Connector:
Depending on the connector type, you may need to crimp or otherwise secure the connector to the cable. Follow the manufacturer's instructions carefully.
1. Visual Inspection:
Use a magnifying glass or microscope to inspect the connection for any gaps, misalignment, or other issues.
www.adsscable.cn
2. Perform a Continuity Test:
Use a fiber optic test set to check for continuity and measure the insertion loss of the connection. This step is essential to ensure the connection meets your performance requirements.
3. Document the Installation:
Record the details of the installation, including the cable type, connector specifications, and test results. This information will be useful for future maintenance and troubleshooting.
1. Mount the Connector:
Secure the MTP connector to an MTP adapter or panel using the appropriate hardware. Ensure the connection is tight and stable.
2. Integrate into the Network:
Connect the MTP connector to the rest of your fiber optic network, following your network's architecture and cabling standards.
Installing MTP fiber connectors may seem daunting at first, but with proper preparation and careful execution, the process can be straightforward and rewarding. By following this installation guide, you can confidently integrate MTP connectors into your fiber optic network, boosting data transmission efficiency and scalability. Remember to always prioritize safety, precision, and thorough testing to ensure a reliable and high-performing connection.