Oufu Optical Fiber Cable Co.,Ltd
Address: Shenyang, Liaoning, China
Contact person: Manager Zhang
Phone: 400-964-1314
Mobile phone: +86 13904053308
【whatsapp && wechat】
2024-06-20 1421
Splicing Fiber Optic Cable: Step-by-Step Guide to Efficiently Join Fibers & Optimize Your Network
Fiber optic cables have become the backbone of modern communication networks, providing high-speed data transmission with minimal signal loss. However, when it comes to maintaining and extending these networks, splicing fiber optic cables efficiently is crucial. This guide will walk you through the step-by-step process of splicing fiber optic cables to ensure optimal network performance.

Step 1: Preparation
Before starting the splicing process, ensure that you have the necessary tools and equipment at hand. This includes a fiber optic fusion splicer, fiber cleavers, fiber stripper, cleaning wipes, and alcohol. Additionally, ensure that the work area is clean and dust-free to prevent contamination of the fibers.
Step 2: Fiber Preparationwww.adsscable.cn
Using the fiber stripper, carefully remove the outer jacket and coating from the ends of the fiber optic cables you wish to splice. Then, using the fiber cleaver, cut the fibers at a 90-degree angle to ensure a clean and flat end face. Clean the end faces with alcohol and a lint-free wipe to remove any residue or dust.
Step 3: Alignment and Cleaving
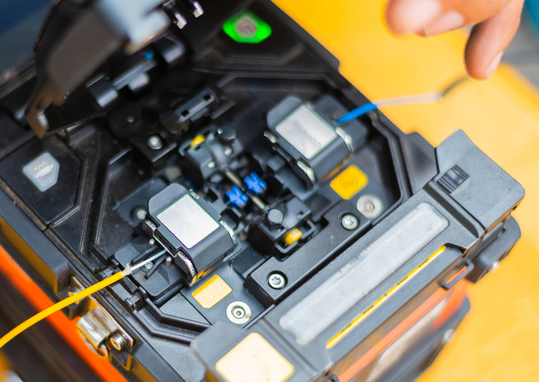
Place the prepared fibers into the fiber optic fusion splicer. The splicer uses precision mechanisms to align the fibers precisely for splicing. Adjust the settings of the splicer based on the type of fibers you are using. Once aligned, use the cleaver built into the splicer to precisely cut the fibers to the desired length.
Step 4: Fusion Splicing
Once the fibers are aligned and cleaved, initiate the fusion splicing process. The splicer will emit a high-intensity arc that melts the ends of the fibers together, forming a permanent bond. Monitor the splicer's display to ensure that the splicing process is proceeding smoothly and that the splice loss is within acceptable limits.
Step 5: Quality Check
After fusion splicing, perform a quality check to ensure that the splice is successful. Use an optical microscope or a visual fault locator to inspect the splice and check for any defects or contamination. Additionally, perform a loss test to measure the amount of light lost at the splice and compare it to the specifications provided by the fiber manufacturer.
Step 6: Protection and Termination
Once the splice is successful and passes the quality check, protect it with a splice protector or a splice tray to prevent any accidental damage. Then, terminate the spliced fibers with connectors or pigtails, depending on your network's requirements.
Conclusion
Splicing fiber optic cables efficiently is essential for maintaining and extending modern communication networks. By following this step-by-step guide, you can ensure that your splices are precise, reliable, and optimize your network's performance. Remember to use the appropriate tools and equipment, maintain a clean work area, and perform quality checks to ensure that each splice meets your network's requirements.